Friday, September 27, 2013

Viking Sketch – Inspired by Pedro Conti’s “One More Beer!”


I’ve always loved vikings. There’s something about their larger-than-life presence that never stops being fun to draw.


This time, I was directly inspired by Pedro Conti’s short film “One More Beer!” The shapes, attitude, and stylization really stuck with me—though I have to admit, the trousers ended up looking a bit like Obelix. Can’t help it… I’m French.


Hope you’ll enjoy this one.


#Viking #OneMoreBeer #PedroConti


Monday, September 23, 2013

WIP – Robot Detail


Here’s a close-up from a robot concept I started a while ago and never quite finished. It’s one of those pieces that got left behind, but I’ve been thinking about picking it back up.

I’m planning to push it further and see it through this time.

Stay tuned—I’ll be sharing the final version soon.


Friday, September 20, 2013

Wildstar Fan Art – A Favorite Character


This is a fan art piece of one of my favorite characters from Wildstar.

I started the initial sketch and base rendering in Corel Painter, then brought it into Photoshop to refine the details and add adjustment layers.

I had a lot of fun working on this one—great character design, bold shapes, and just the right mix of attitude and style that makes it a joy to draw.

#Wildstar #ConceptArt #Photoshop #CorelPainter


Thursday, August 1, 2013

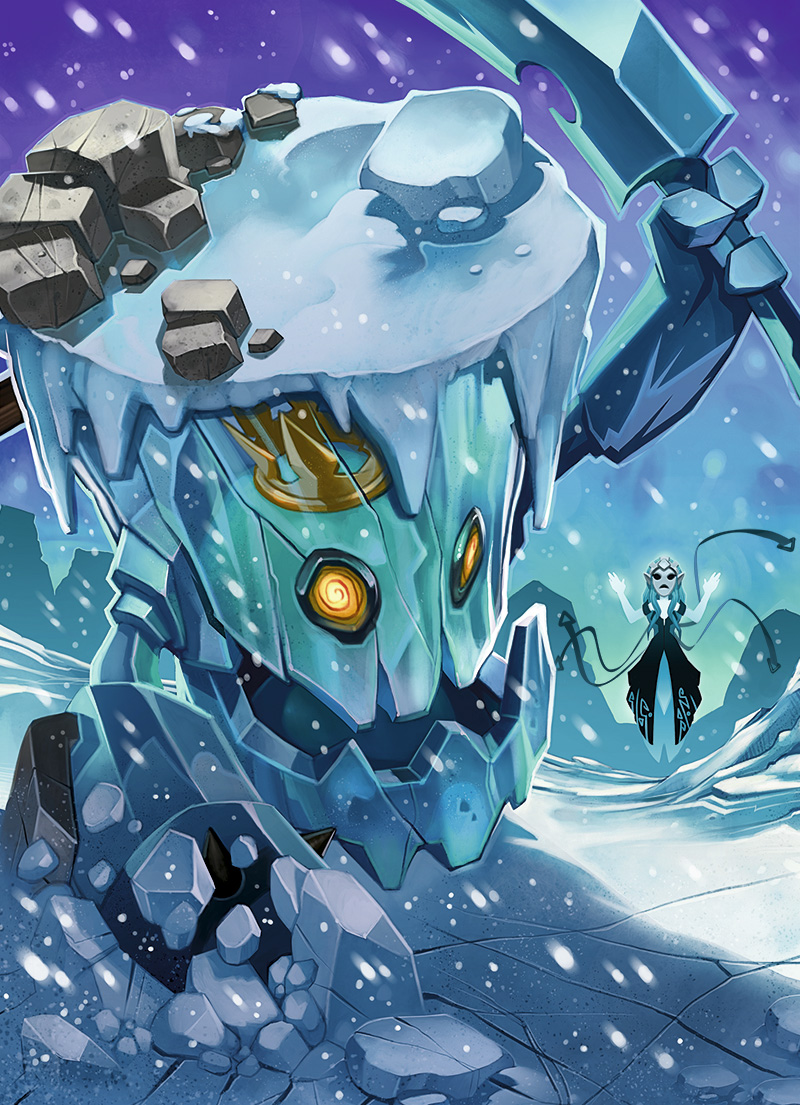
Wakfu Magazine No.7 – Cover Illustration

This is the first of three covers I created for Wakfu Magazine, published by Ankama. It was a fun project with a clear brief—the characters to be featured were already defined, so the focus was on composition, energy, and fitting everything into a strong, readable cover layout.


The entire illustration was done in Photoshop, from sketch to final polish.


Looking forward to sharing the next two covers soon.


And this is the cover with no titles:


I hope that you will enjoy it. As usual feel free to comment and share. :)

Monday, July 29, 2013

Video Game: Cosmic Colony

Here’s a look at another fun video game I worked on as a concept artist at Gameloft.


This project involved a lot of back and forth during the design phase—refining shapes, testing ideas, and adjusting the visuals until everything felt right.


The image here shows how the final concept turned out, and it’s always satisfying to see those early sketches evolve into something polished and playable.


The final renders featured in the in-game screenshots were done by Andre Mealha Brown—great work bringing the designs to life in-game.


More to come.


Saturday, July 13, 2013

Wonder Zoo – Gameloft Project


Wonder Zoo is another title I contributed to during my time as a concept artist at Gameloft.


For this project, my role was less about early concept development and more focused on post-production work. That included retouching load screens, refining in-game illustrations, and working on various graphic elements used throughout the interface.


While I don’t have many concepts to share from this one, it was still a rewarding experience, especially in terms of supporting the visual polish and consistency of the final product.


A different kind of contribution, but still an important part of the process.


https://play.google.com/store/apps/details?id=com.gameloft.android.ANMP.GloftZRHM
https://itunes.apple.com/en/app/wonder-zoo-animal-dinosaur/id518313894?l=en&mt=8

Friday, July 5, 2013

Quick Tutorial – Installing Painter’s Wheel in Photoshop

Quick Tutorial - Installing Painters' Wheel.

I’ve been asked many times about the color wheel visible on my Photoshop screen. It’s not built-in—it’s actually a Photoshop extension called Painter’s Wheel, and it’s one of the most useful plugins I use on a daily basis.


This free plugin adds a dedicated color wheel panel to your workspace, replicating the Corel Painter color system with a more intuitive interface than Photoshop’s default color picker. It features a ring for Hue, and a triangle for Saturation and Value, making color selection fast and visually clear.


One feature I find particularly useful: by clicking the small triangle at the bottom right of the panel, you can generate a gradient between two colors (A and B), which helps a lot when working with subtle transitions or palettes.


To install the Painter’s Wheel, just visit http://lenwhite.com and follow the steps provided. It’s simple, lightweight, and compatible with the Photoshop CS6 interface.


Highly recommended for anyone looking to improve their color workflow in Photoshop. Give it a try.


Enjoy.


Video Game: Run Sheldon


This is the last video game project I worked on, where I was in charge of Art Direction. I’m happy to finally share it with you, and I hope you’ll enjoy playing it as much as we enjoyed building it.


You can download it for free here:

👉 Run Sheldon! on the App Store


In Run Sheldon!, you play as Sheldon, the legendary tortoise who once beat the Hare in the famous race. But the Hare gang hasn’t taken the loss very well. They’re after your golden trophy, and they’ll stop at nothing to get it.


Your mission? Run for your life.


Tap to jump, hold to jump higher, and use well-timed landings to crush enemies and build up your protective shell. Along the way, pick up power-ups like Super Wings, Mega Boost, and Glide Power, collect coins, unlock upgrades, and try to outdistance your friends on the leaderboard.


The further you go, the tougher it gets. But the rewards—and the fun—are worth it.


It was a pleasure working on the visual direction for this title, and I’m proud of how it turned out. Have fun, and don’t forget—Run, Sheldon!


The video trailer:


And don't forget to like the Facebook page! :)
https://www.facebook.com/runsheldon

And this is the entire family of hares you will have to fight against! ^^


Thursday, June 20, 2013

Quick Tutorial - Create a Nicolas Marlet Pencil

Quick Tutorial - Create a Nicolas Marlet Pencil

Haven't you been completely seduced and hypnotized by Nicolas Marlet lines and curves? His ability to give life to his characters (Kung Fu Panda, How to Train your Dragon, etc...) is just fantastic.
Pencils and coloured pencils on a textured paper (probably a kind of Ingres Charcoal Paper). This makes everything look so natural and artistic.


Well, actually this is something that you can easily reproduce in Photoshop (even more easily in Corel Painter).

This is the way I proceed to make it:

- Start with a simple round brush.
- Modify the shape of the brush to get something elliptic and squeezed giving the brush a 30 degrees or a 45 degrees angle (whatever you are confortable with). This will help to fake the natural position and inclination of the pencil in your hand.
- Set a minimum size. Natural coloured pencils are never so sharp. So a 30-35% minimum diameter is perfect. If you really need thinner lines you can decrease the size of the brush easily.
- Set a minimum opacity. 0% opacity when drawing with the tablet stylus doesn't make any sense. Once again a 30-35% value is a good choice.
- Finally add a texture to your pencil. I personally used the Default Primed Linen texture with a 180% scale and linear burn mode but you can use any texture you want. Just make sure to select a texture that is visible when you draw at the actual printing or screen size. You can use pre-made photoshop textures or import yours (I will make a tutorial about this one day).
Feel free to adjust the texture size according to your document resolution. Reduce the texture size for a smaller document and increase it for a larger one.

I also applied a color dynamic to create subtle color variations (this is something that I tend to do for almost all my Photoshop brushes, it will be explained in another quick tutorial). You can uncheck the option if you don't like it.

And if you are really lazy to make it yourself here is the brush I use:


ShareThis