I wanted to draw something heavily inspired by The Croods, playing with shapes, expressions, and that sense of bold, exaggerated design the film does so well.
Just a fun exercise to push character proportions and loosen up.
Hope you enjoy it!

I wanted to draw something heavily inspired by The Croods, playing with shapes, expressions, and that sense of bold, exaggerated design the film does so well.
Just a fun exercise to push character proportions and loosen up.
Hope you enjoy it!

This is a work in progress—a drawing I’m really looking forward to turning into a full illustration.
Aside from the sketch itself, it’s also a good look at how I’ve organized my Photoshop workspace. I keep my tools on the right (I’m right-handed), and place the Coolorus Color Picker and Navigator panels on the left for quick access.
I often use Tab or Shift+Tab to toggle a clean workspace while painting, so I can focus entirely on the image without distractions.
More to come as I work through the next stages. Looking forward to finishing this one.

I finally found the time to finish this Wildstar fan art, featuring an Aurin character. I could have spent a few more hours on the details, but I’ve decided to leave it as it is. Sometimes it’s better to let a piece go than to overwork it.
Really enjoyed working on this one, and I hope you like it too. If it resonates with you, feel free to share it.
Now that I can fully dedicate more of my free time to personal work, I’m looking forward to creating and posting more soon. Stay tuned.

I’ve been experimenting with some new techniques while getting more familiar with Photoshop CS6.
This piece is part of that exploration—a quick Batman study where I focused on brush handling, edges, and layering. Still in training mode, but it’s always good to push outside the usual habits and see what the software has to offer.
More to come as I keep testing and refining.
#Photoshop #Batman


Just a quick sketch of King Fergus, done with Col-Erase pencil on Moleskine.
Always fun to revisit this character—there’s something satisfying about his shapes and expressions that makes him a great subject for loose, energetic drawing sessions.
More doodles to come.
One thing I’ve always found missing in Photoshop—and strangely available in other Adobe tools—is a proper “Save and Increment” feature. You know, that handy function where each save automatically bumps the filename up by one version: filename-v6.jpg, filename-v7.jpg, and so on.
Photoshop doesn’t have this built-in, so you need to do it manually every time… unless you automate it.
Personally, I use a small but powerful app called Hazel. It’s a macOS utility that automates file management tasks like cleaning up your Downloads folder or sorting files based on name, type, or size. But it’s also perfect for automating versioning.
Since I often send multiple iterations of concept art to clients, I’ve created a Hazel rule that watches a specific folder. Every time I save a .jpg file containing the word iteration, Hazel automatically creates a copy with an incremented filename—no typing, no renaming, no extra steps.
Here’s how the rule works

Whenever a file is saved with the word iteration in its name and a .jpg extension, Hazel detects it and adds the next version number automatically.
It’s simple, effective, and has saved me hours of file management over the years.

Highly recommended if you’re juggling multiple versions and want to keep your workflow clean and organized.

Just a quick sketch for today’s warm-up.
Yes, I do like drawing vikings—there’s something about the mix of rugged shapes, character, and attitude that makes them a lot of fun to explore.
More to come.

I’ve always loved vikings. There’s something about their larger-than-life presence that never stops being fun to draw.
This time, I was directly inspired by Pedro Conti’s short film “One More Beer!” The shapes, attitude, and stylization really stuck with me—though I have to admit, the trousers ended up looking a bit like Obelix. Can’t help it… I’m French.
Hope you’ll enjoy this one.
#Viking #OneMoreBeer #PedroConti

Here’s a close-up from a robot concept I started a while ago and never quite finished. It’s one of those pieces that got left behind, but I’ve been thinking about picking it back up.
I’m planning to push it further and see it through this time.
Stay tuned—I’ll be sharing the final version soon.

This is a fan art piece of one of my favorite characters from Wildstar.
I started the initial sketch and base rendering in Corel Painter, then brought it into Photoshop to refine the details and add adjustment layers.
I had a lot of fun working on this one—great character design, bold shapes, and just the right mix of attitude and style that makes it a joy to draw.
#Wildstar #ConceptArt #Photoshop #CorelPainter
This is the first of three covers I created for Wakfu Magazine, published by Ankama. It was a fun project with a clear brief—the characters to be featured were already defined, so the focus was on composition, energy, and fitting everything into a strong, readable cover layout.
The entire illustration was done in Photoshop, from sketch to final polish.
Looking forward to sharing the next two covers soon.


Here’s a look at another fun video game I worked on as a concept artist at Gameloft.
This project involved a lot of back and forth during the design phase—refining shapes, testing ideas, and adjusting the visuals until everything felt right.
The image here shows how the final concept turned out, and it’s always satisfying to see those early sketches evolve into something polished and playable.
The final renders featured in the in-game screenshots were done by Andre Mealha Brown—great work bringing the designs to life in-game.
More to come.


Wonder Zoo is another title I contributed to during my time as a concept artist at Gameloft.
For this project, my role was less about early concept development and more focused on post-production work. That included retouching load screens, refining in-game illustrations, and working on various graphic elements used throughout the interface.
While I don’t have many concepts to share from this one, it was still a rewarding experience, especially in terms of supporting the visual polish and consistency of the final product.
A different kind of contribution, but still an important part of the process.
I’ve been asked many times about the color wheel visible on my Photoshop screen. It’s not built-in—it’s actually a Photoshop extension called Painter’s Wheel, and it’s one of the most useful plugins I use on a daily basis.

This free plugin adds a dedicated color wheel panel to your workspace, replicating the Corel Painter color system with a more intuitive interface than Photoshop’s default color picker. It features a ring for Hue, and a triangle for Saturation and Value, making color selection fast and visually clear.
One feature I find particularly useful: by clicking the small triangle at the bottom right of the panel, you can generate a gradient between two colors (A and B), which helps a lot when working with subtle transitions or palettes.

To install the Painter’s Wheel, just visit http://lenwhite.com and follow the steps provided. It’s simple, lightweight, and compatible with the Photoshop CS6 interface.
Highly recommended for anyone looking to improve their color workflow in Photoshop. Give it a try.
Enjoy.

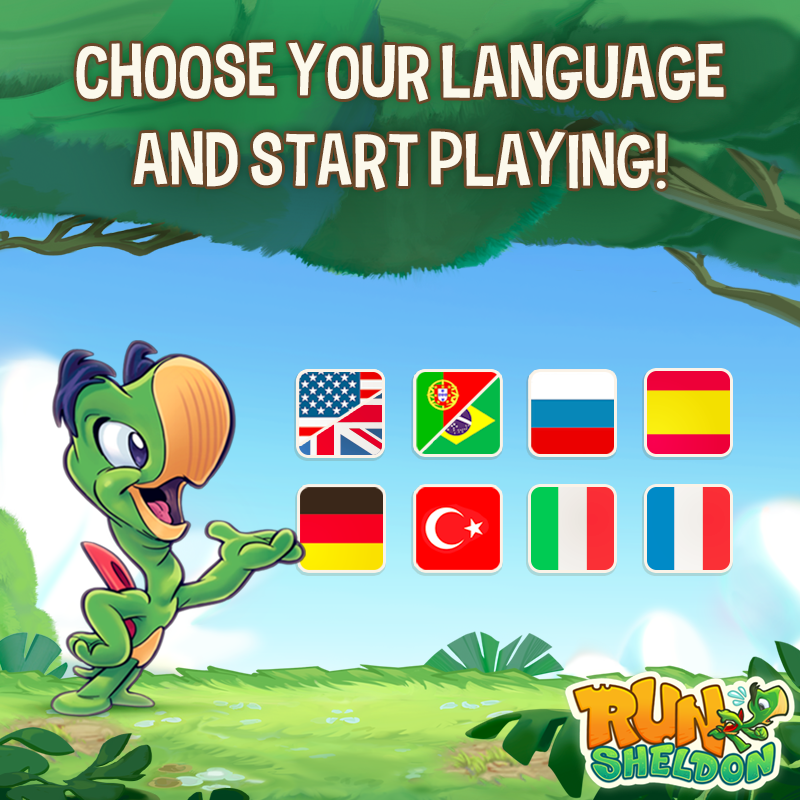
This is the last video game project I worked on, where I was in charge of Art Direction. I’m happy to finally share it with you, and I hope you’ll enjoy playing it as much as we enjoyed building it.
You can download it for free here:
👉 Run Sheldon! on the App Store
In Run Sheldon!, you play as Sheldon, the legendary tortoise who once beat the Hare in the famous race. But the Hare gang hasn’t taken the loss very well. They’re after your golden trophy, and they’ll stop at nothing to get it.
Your mission? Run for your life.
Tap to jump, hold to jump higher, and use well-timed landings to crush enemies and build up your protective shell. Along the way, pick up power-ups like Super Wings, Mega Boost, and Glide Power, collect coins, unlock upgrades, and try to outdistance your friends on the leaderboard.
The further you go, the tougher it gets. But the rewards—and the fun—are worth it.
It was a pleasure working on the visual direction for this title, and I’m proud of how it turned out. Have fun, and don’t forget—Run, Sheldon!